 Save
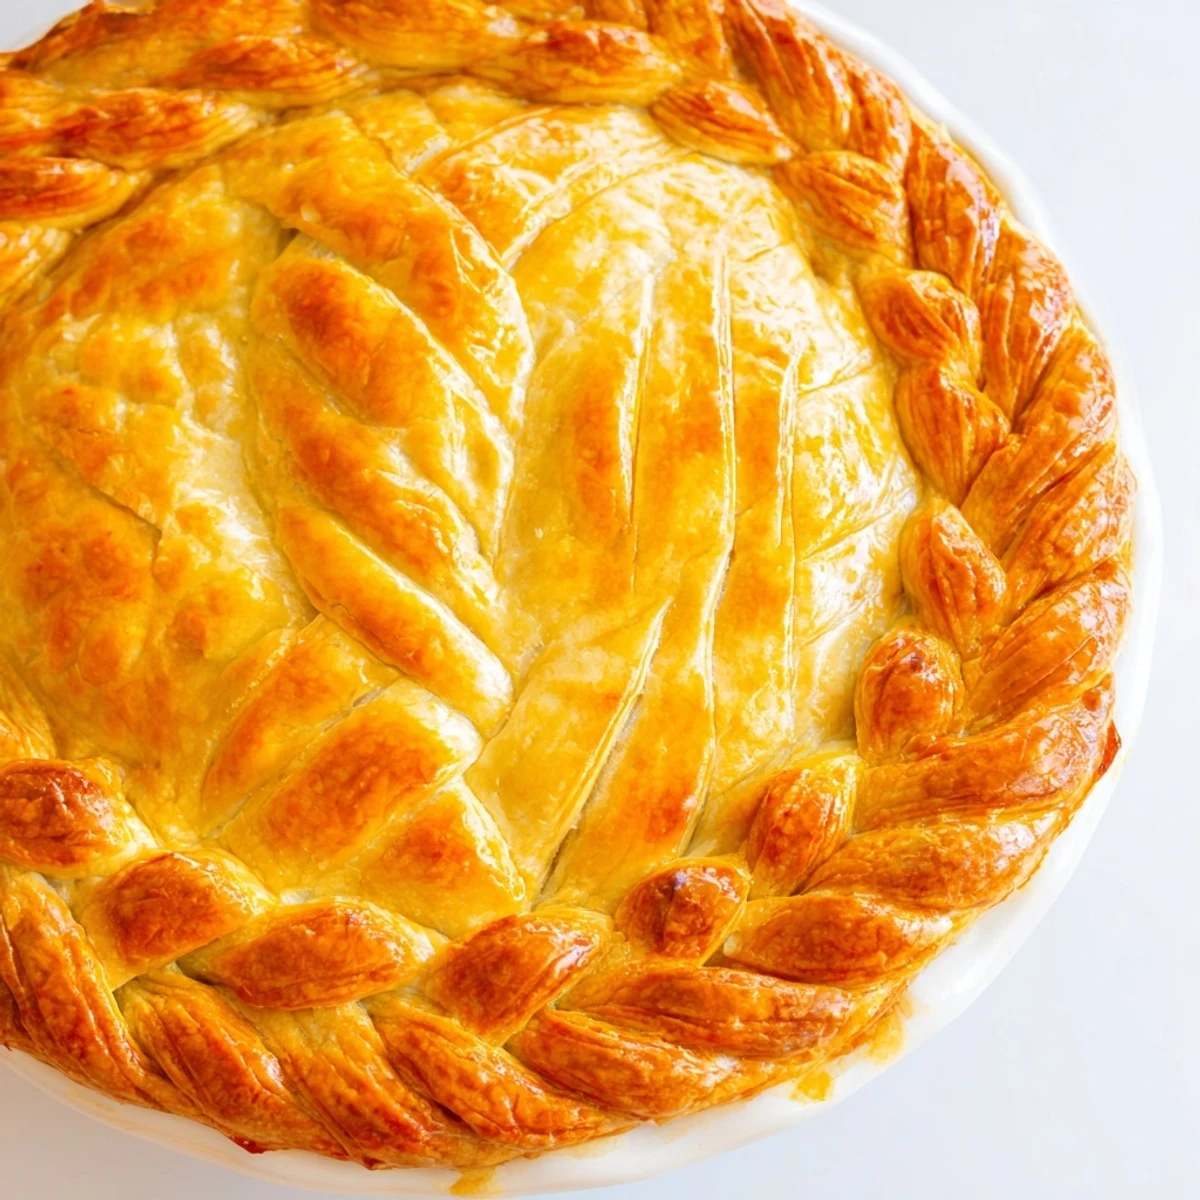
Save Transform ordinary pies into stunning creations with this fishtail braid crust technique. The decorative braid adds professional elegance while maintaining flaky, buttery texture. This versatile topping works beautifully with fruit fillings like apple or cherry, creamy custards, or savory options like quiche and pot pies. The intricate weaving impresses guests yet remains achievable for home bakers of intermediate skill levels.
The first time I attempted a braided pie crust, my kitchen looked like a flour explosion had gone off. I had seen these stunning braided edges on Instagram and thought, how hard could it be? Turns out, braiding dough is trickier than hair, but after three failed attempts and a lot of laughs, I finally got the hang of it. Now whenever I bring a braided-crusted pie to gatherings, people act like I am some sort of pastry wizard.
My sister visited last fall and we spent an entire Sunday experimenting with different braid patterns. We played folk music, drank too much coffee, and ended up with flour in our hair. By the third pie, we had developed a system and the fishtail braid finally clicked. That evening, we ate warm apple pie with the most gorgeous crust either of us had ever made.
Ingredients
- All-purpose flour: The structure that holds everything together, do not pack it down when measuring
- Cold unsalted butter: Cold butter creates those magical flaky layers we all love in pie crust
- Salt: Just enough to make the butter flavor sing without being salty
- Sugar: A subtle sweetness that helps with browning and balances the dough
- Ice water: The key to tender crust, add it slowly and stop when the dough just comes together
- Egg and milk: For that gorgeous golden shine that makes everyone want a slice immediately
Instructions
- Make the dough foundation:
- Whisk your flour, salt, and sugar in a large bowl until combined, then work in those cold butter cubes with a pastry cutter or your fingertips until you see coarse crumbs with some pea-sized butter pieces remaining.
- Bring it together:
- Drizzle in ice water a tablespoon at a time, gently tossing with a fork after each addition until the dough holds together when squeezed.
- Rest the dough:
- Divide into two discs, wrap tightly, and let them chill for at least an hour so the gluten relaxes and the butter firms up again.
- Prep the base:
- Roll out one disc on a floured surface, press it into your 9-inch pie plate, trim the edges, and pop it back in the fridge while you work on the braiding magic.
- Cut your strips:
- Roll the second disc to about 1/4 inch thick and cut twelve long strips, about 1/2 inch wide, keeping them as even as possible.
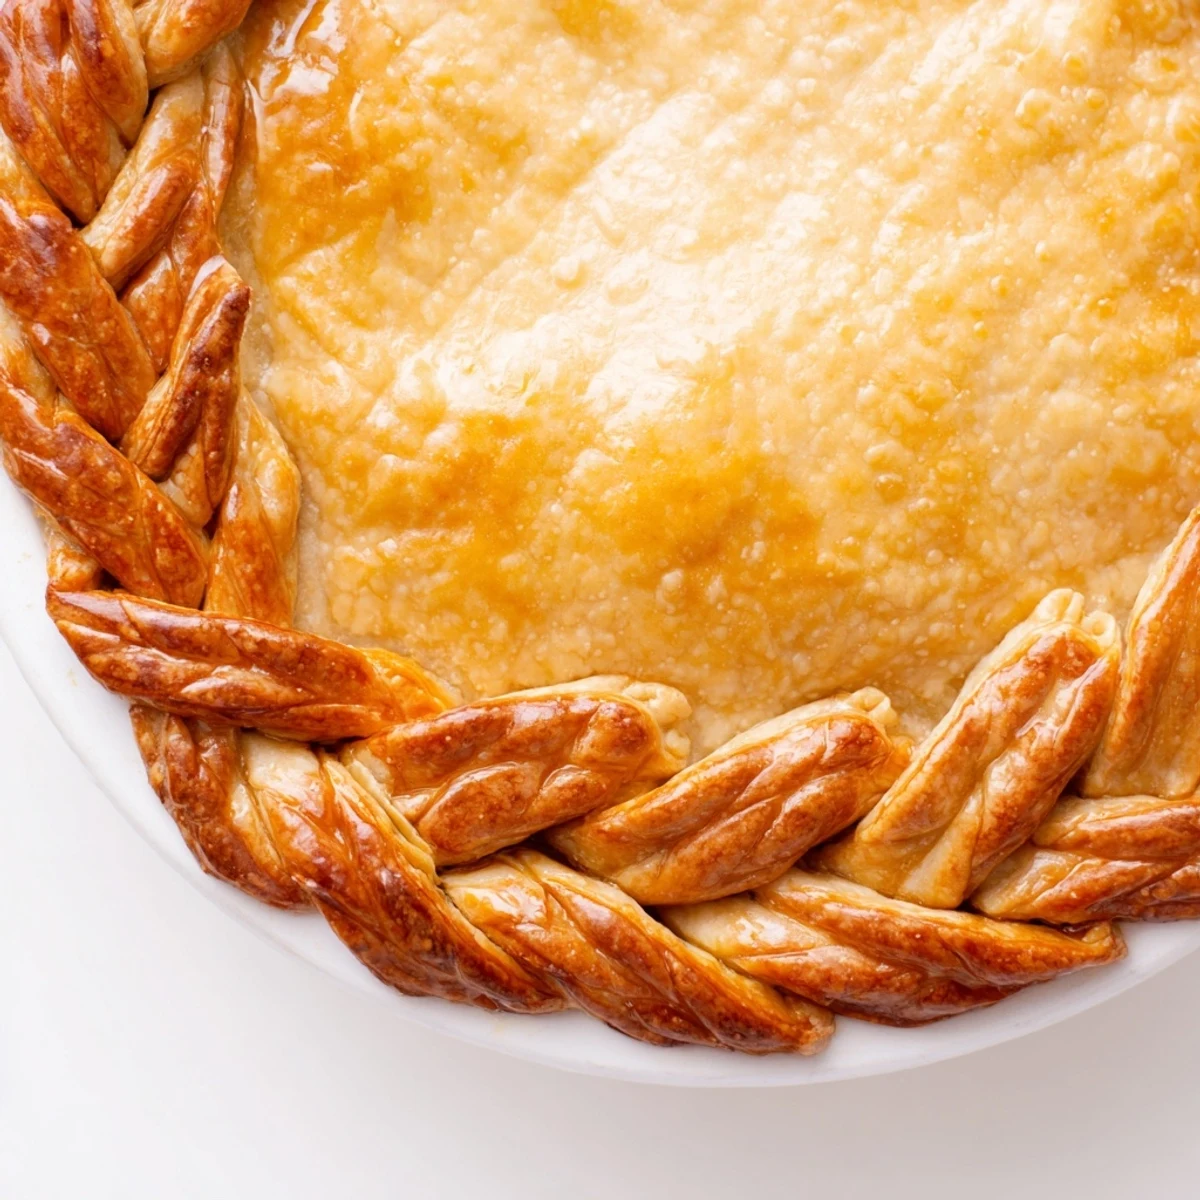
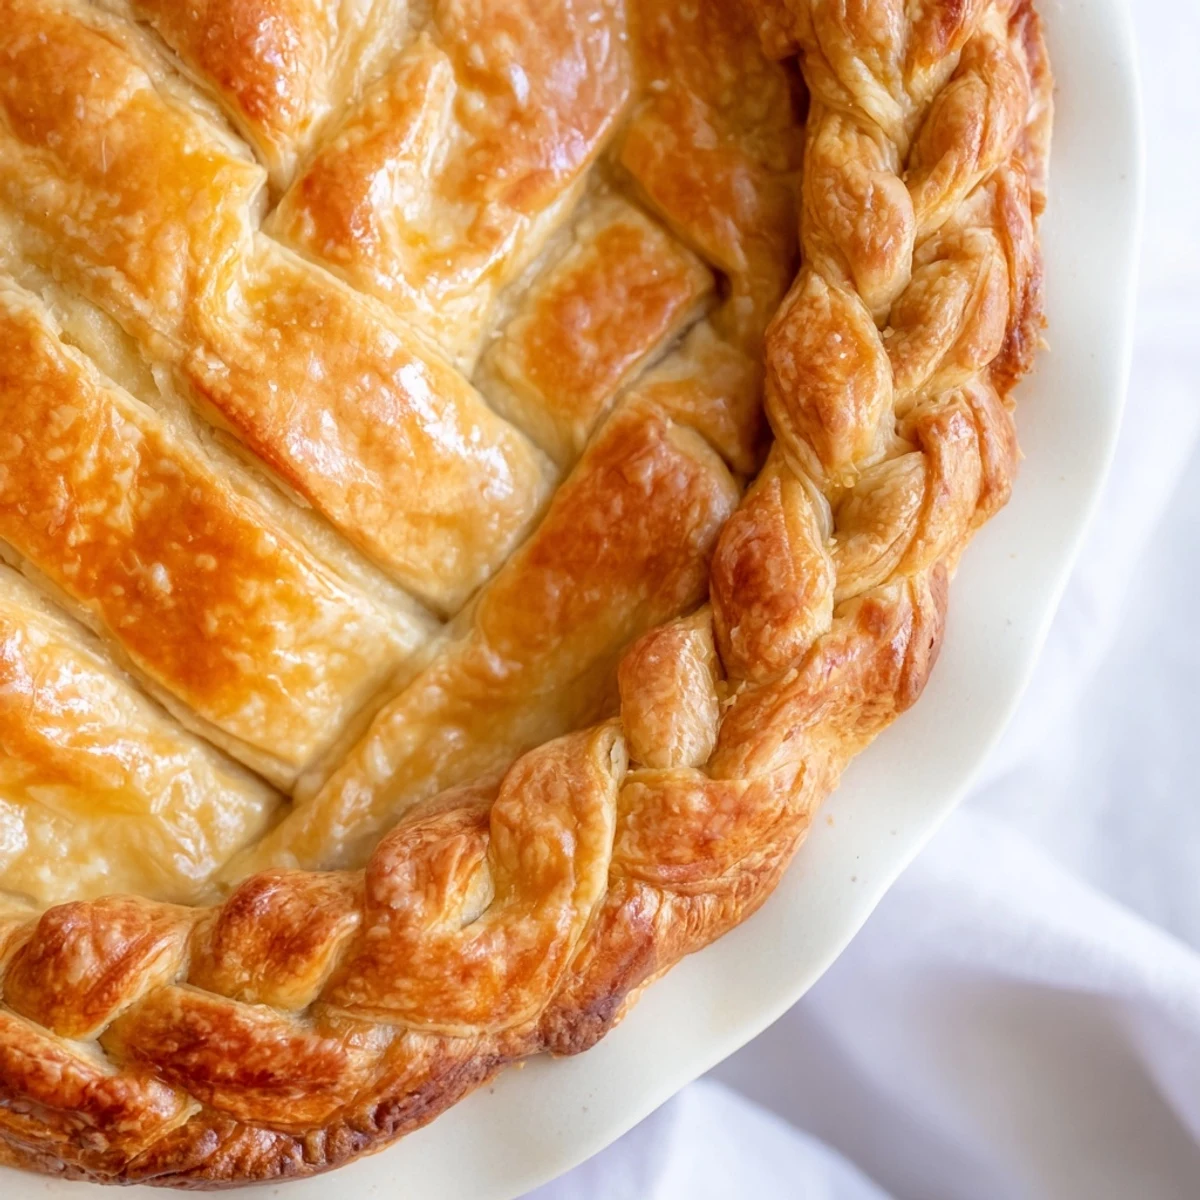
- Create the fishtail:
- Group strips into sets of four, pinch the tops together, then take the leftmost strip over, under, over, repeating with the new leftmost strip each time until braided.
- Attach the braid:
- Carefully transfer your braids to the chilled pie edge, pressing gently to seal, and use a dab of water if needed to help them stick.
- Chill again:
- Give the whole pie another 15 minutes in the fridge so everything firms up before baking.
- Add the shine:
- Brush the braid with your egg wash mixture, then bake at 400 degrees for 12 to 15 minutes until beautifully golden.
 Save
Save This crust has become my go-to for holiday pies and dinner parties. Last Thanksgiving, my grandmother actually asked if I had bought it from a bakery. That moment of pride, watching everyone admire the crust before even taking a bite, is what keeps me braiding.
Making It Your Own
I have learned that the fishtail braid works beautifully with different flavors. Sometimes I add cinnamon to the dough for apple pies, or herbs like rosemary for savory quiches. The braid itself can be shorter and placed just along sections of the edge, or you can attempt one continuous braid if your strips are long enough.
When Things Go Wrong
My first few attempts resulted in braids that fell apart or shrunk dramatically in the oven. The solution turned out to be patience, proper chilling, and not overhandling the dough. If your braid looks messy, brush it with egg wash anyway, it will still taste incredible and no one will mind the imperfections.
Storage and Make Ahead Tips
The dough discs can be made up to three days ahead and kept wrapped in the refrigerator, or frozen for up to three months. If freezing, thaw overnight in the fridge before rolling. You can also braid the strips separately, freeze them on a baking sheet, then attach them to your pie when ready.
- Brush the braid right before baking, not ahead of time
- If edges brown too quickly, tent with foil
- Let the pie cool for at least an hour before slicing
 Save
Save There is something deeply satisfying about creating something so beautiful with your own hands. I hope this recipe brings you as much joy in the making as it does in the eating.
Recipe FAQs
- → What is a fishtail braid pie crust?
-
A fishtail braid pie crust is a decorative pastry topping created by weaving strips of dough in an intricate pattern resembling a fishtail braid. This technique adds visual elegance and professional flair to homemade pies while maintaining the delicious, flaky texture of traditional crusts.
- → How difficult is making a fishtail braid crust?
-
This technique requires medium difficulty, best suited for bakers with some pastry experience. The braiding method takes practice to master, but the detailed instructions break down each step clearly. Beginners should allow extra time and consider practicing the braid pattern before applying it to the actual pie.
- → Can I make this crust ahead of time?
-
Yes, prepare the dough up to 2 days in advance and refrigerate wrapped tightly. The braided crust can be assembled and frozen unbaked for up to 3 months. When ready to bake, add 5-10 minutes to the baking time if going from frozen to oven.
- → What fillings work best with this decorative crust?
-
This versatile crust complements both sweet and savory fillings. Excellent choices include apple, cherry, blueberry, or peach pies, pumpkin pie, lemon meringue, chicken pot pie, vegetable quiches, and shepherd's pie. The braid structure holds up well during baking without becoming soggy.
- → Do I need special tools to create the braid?
-
Basic kitchen tools suffice: a sharp knife or pastry wheel for cutting strips, a rolling pin for rolling dough, and your hands for braiding. A pastry brush applies egg wash for golden color. Pie weights and parchment paper are needed only if blind baking the crust before adding filling.
- → Can I use store-bought pie dough?
-
Yes, refrigerated pie dough works well for this technique. Let it thaw according to package instructions, then roll and cut into strips. Homemade dough typically produces better results due to optimal texture and pliability, but store-bought offers a convenient time-saving alternative.