 Save
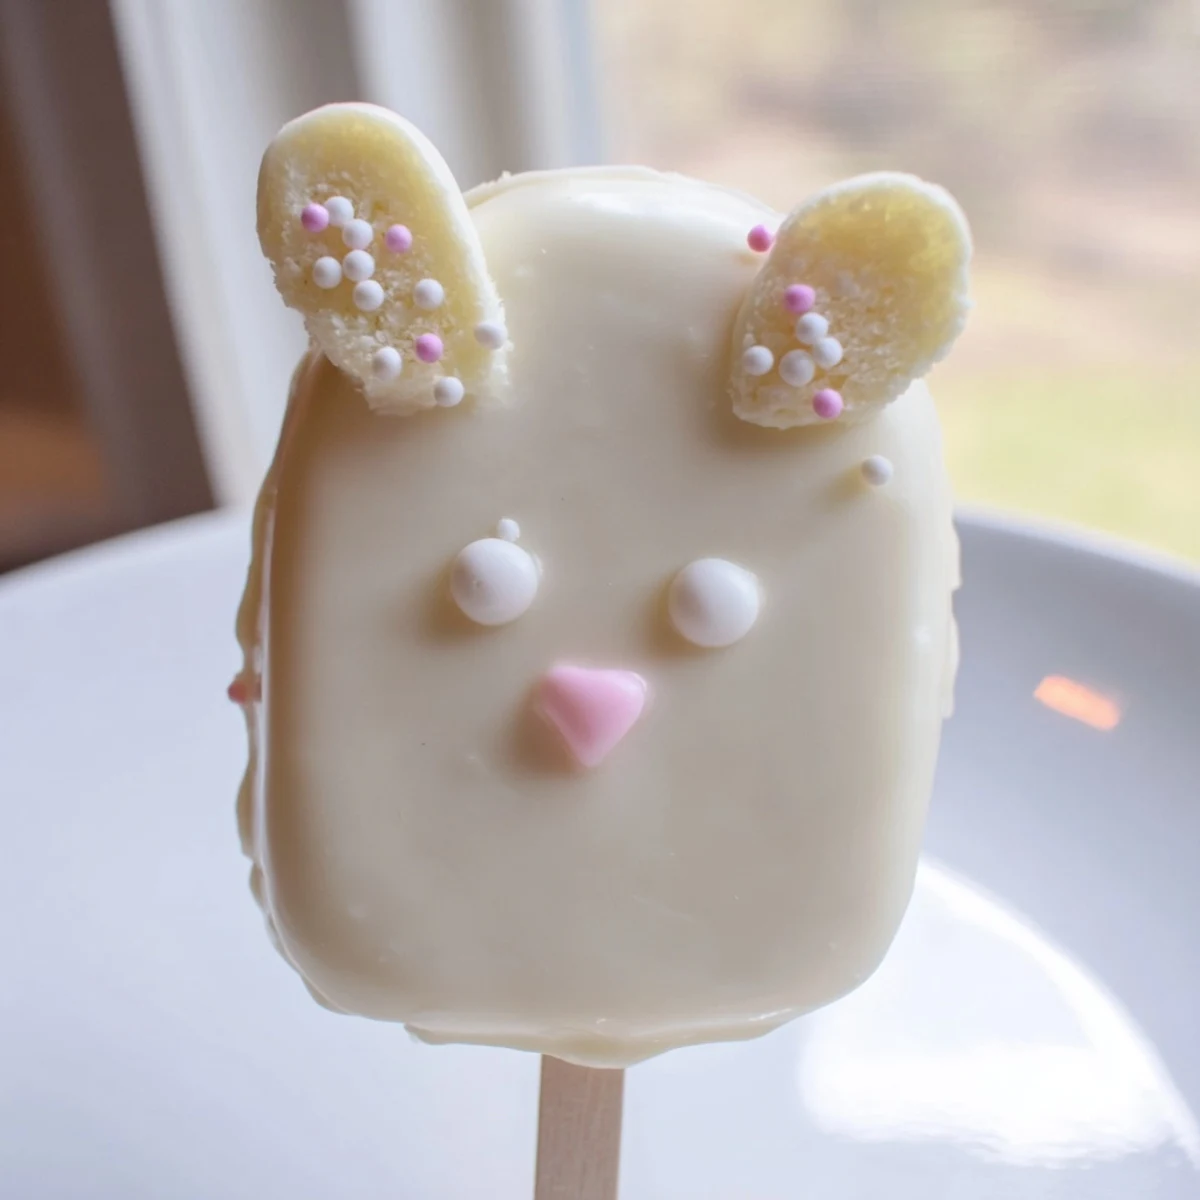
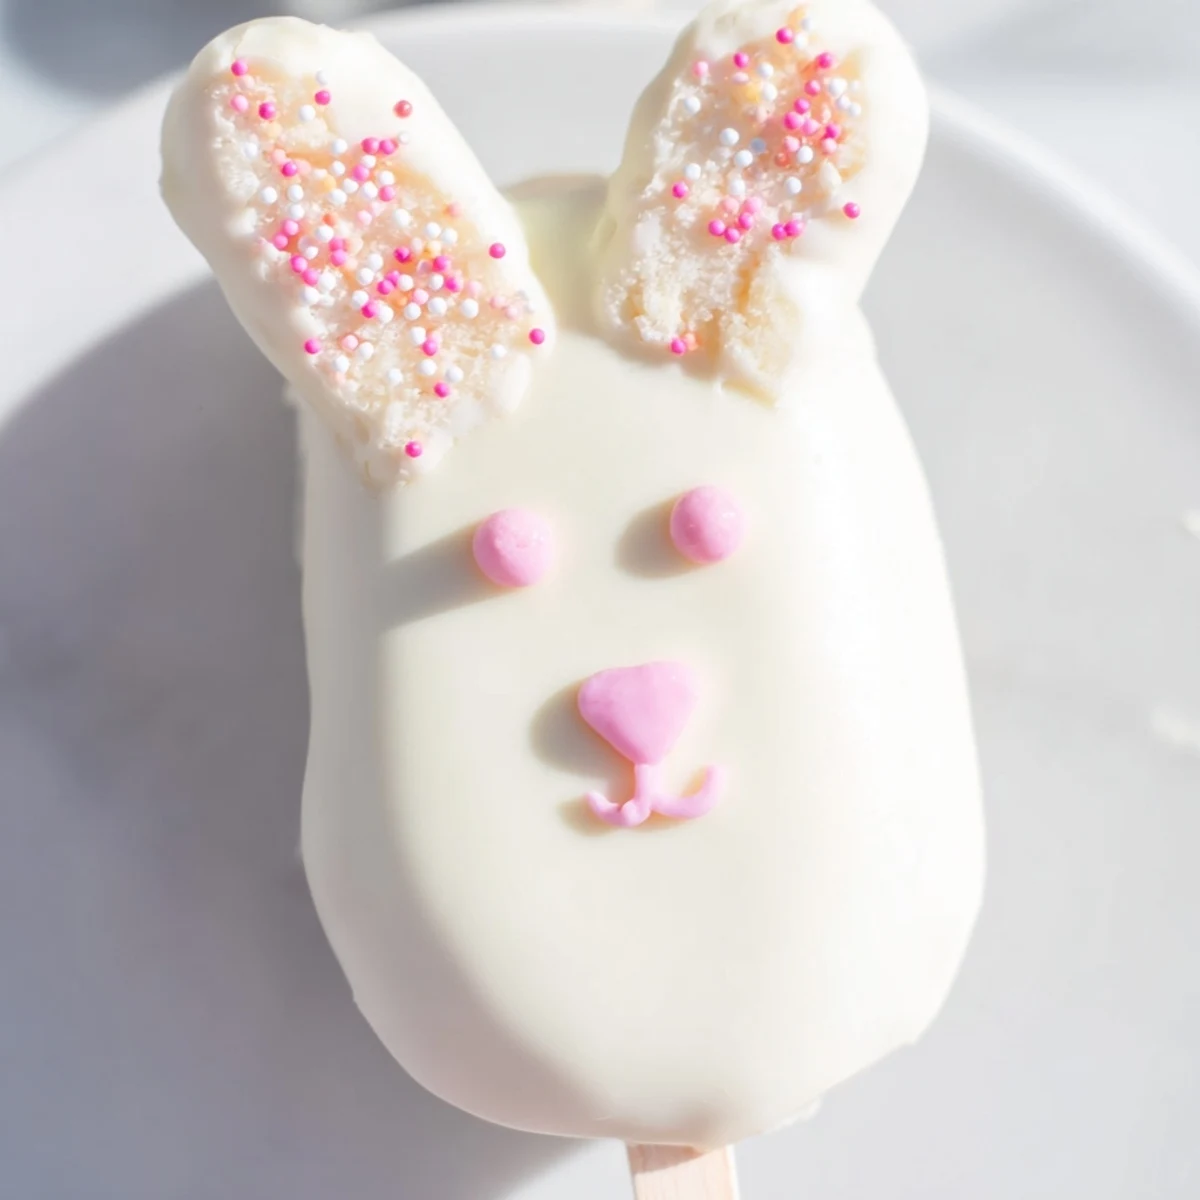
Save These delightful bunny-shaped cakesicles combine crumbled vanilla cake with cream cheese and butter, dipped in smooth white chocolate for a festive Easter treat. Each handheld dessert features a moist, doughy interior surrounded by a creamy white chocolate shell, decorated with candy eyes, sprinkles, and fondant bunny features.
The preparation comes together in just one hour with simple ingredients you likely have on hand. Shape the cake mixture into playful bunny faces, insert sticks, and coat with melted white chocolate for an impressive yet easy dessert that both kids and adults will adore during spring celebrations.
The kitchen was already covered in pastel sprinkles when my niece announced that regular Easter eggs were "so last year." She pulled out a bunny-shaped sketch and insisted we needed something that combined cake pops with actual Easter energy. That afternoon became a chaotic, wonderful experiment in creating these cakesicles, and now they are the one thing my family actually asks for weeks in advance.
Last Easter, my sister accidentally made her bunny faces with slightly wonky ears, and honestly, those imperfect ones disappeared faster than the picture-perfect batch. There is something about handing someone a cake on a stick that makes everyone feel like a kid again, regardless of how old they actually are.
Ingredients
- 1 cup vanilla cake crumbs: These form the base of your cakesicle, so use cake you actually enjoy eating, whether homemade or from a trusted bakery.
- 2 tbsp cream cheese: This binds everything together while adding that tangy creaminess that balances the sweet coating.
- 1 tbsp unsalted butter: Softened butter helps the mixture hold its shape without making it too dense or heavy.
- 2 tbsp powdered sugar: Just enough sweetness to bring the filling together without overpowering the white chocolate shell.
- 1/2 tsp vanilla extract: Pure vanilla extract rounds out all the flavors and makes the cake taste freshly baked.
- 10 oz white chocolate: High-quality white chocolate melts smoothly and creates that gorgeous, creamy coating that sets beautifully.
- Edible gel food coloring: A tiny bit goes a long way for adding pink noses, ears, or any colorful details.
- 8 cakesicle sticks: Make sure these are food-grade and sturdy enough to hold the weight of the cake and chocolate.
- Sprinkles, candy eyes, or fondant decorations: These bring the bunny personality to life, so choose whatever makes you smile.
Instructions
- Mix the cake base:
- Combine the cake crumbs, cream cheese, butter, powdered sugar, and vanilla extract in a medium bowl. Mix until the ingredients come together into a dough-like mixture that holds its shape when you squeeze it.
- Shape the bunnies:
- Divide the mixture into 8 equal portions and gently press each into a flattened oval shape with slightly pointed ears at the top. Press a cakesicle stick into the bottom center of each shape, making sure it goes about halfway through but does not poke out the top.
- Chill until firm:
- Place the shaped cakesicles on a parchment-lined tray and refrigerate for 20 to 30 minutes until firm. Chilled cakesicles hold their shape much better when you dip them in warm chocolate.
- Melt the coating:
- Melt the white chocolate in a microwave-safe bowl in 30-second intervals, stirring thoroughly between each burst. Stop when the chocolate is completely smooth and has the consistency of heavy cream.
- Dip and coat:
- Dip each chilled cake pop straight down into the melted chocolate, then lift it out and gently tap your wrist against the bowl to let any excess drip off. Rotate the cakesicle as the chocolate sets to create an even, smooth coating.
- Add the details:
- Immediately place the cakesicle back on the parchment tray and press candy eyes, sprinkles, or fondant ears into the soft chocolate. Work quickly because the white chocolate sets fast, and decorations need to stick while it is still tacky.
- Set completely:
- Let the cakesicles sit at room temperature for 15 to 20 minutes until the chocolate is fully set, or pop them in the fridge for 5 minutes if you are in a hurry. Once firm, use food coloring pens to add tiny pink noses or whiskers if you want extra detail.
 Save
Save My friend Sarah made these for her daughter's class party and said the kids were so excited that even the supposedly "too cool" fifth graders asked for seconds. Something about eating cake on a stick just hits differently than a regular slice, and the bunny faces make them impossible to resist.
Make Them Yours
Swap the vanilla cake crumbs for chocolate, lemon, or even red velvet if you want to surprise people with a different flavor inside. You can also tint the white chocolate with pastel food coloring before dipping for dreamy sunset gradients or baby-blue bunnies.
Decoration Secrets
Fondant ears look impressive but take practice, so pretzel sticks dipped in pink chocolate are a brilliant hack for floppy bunny ears that actually stay in place. Candy eyes are cute, but tiny dots of white chocolate with mini chocolate chips for pupils work just as well in a pinch.
Storage And Serving
These cakesicles keep beautifully in the fridge for up to three days, which means you can make them two days before Easter and actually relax on the morning of the celebration. Layer them between sheets of parchment paper in an airtight container so the decorations do not get smushed.
 Save
Save These bunny cakesicles have become the sweet centerpiece of our Easter table, and honestly, seeing how happy people get when they pick one up is better than any compliment on a fancy dessert.
Recipe FAQs
- → How far in advance can I make these cakesicles?
-
You can prepare these up to 3 days ahead and store them in an airtight container in the refrigerator. The white chocolate coating helps keep the cake interior fresh and moist.
- → Can I use different cake flavors?
-
Absolutely! Chocolate, lemon, strawberry, or red velvet cake crumbs work wonderfully. Just ensure the crumbs are finely crumbled for the best texture when mixed with the cream cheese binder.
- → What if my white chocolate coating is too thick?
-
Add 1 teaspoon of coconut oil or vegetable shortening to the melted white chocolate to thin it out. This makes dipping easier and creates a smoother, more even coating on each cakesicle.
- → Do I need a special cakesicle mold?
-
No mold required! You can hand-shape the cake mixture into flattened ovals or bunny faces. However, a mold does help create uniform shapes and makes the process faster if you're making a large batch.
- → How do I prevent the sticks from falling out?
-
Ensure the cake mixture is well-chilled before inserting sticks. Dip the tip of each stick in melted white chocolate before inserting into the cake shape—the chocolate acts as glue once it hardens.
- → Can I freeze these for later?
-
Yes! Place finished cakesicles on a baking sheet until frozen solid, then transfer to a freezer-safe container. Thaw in the refrigerator for 2-3 hours before serving for best results.