Save
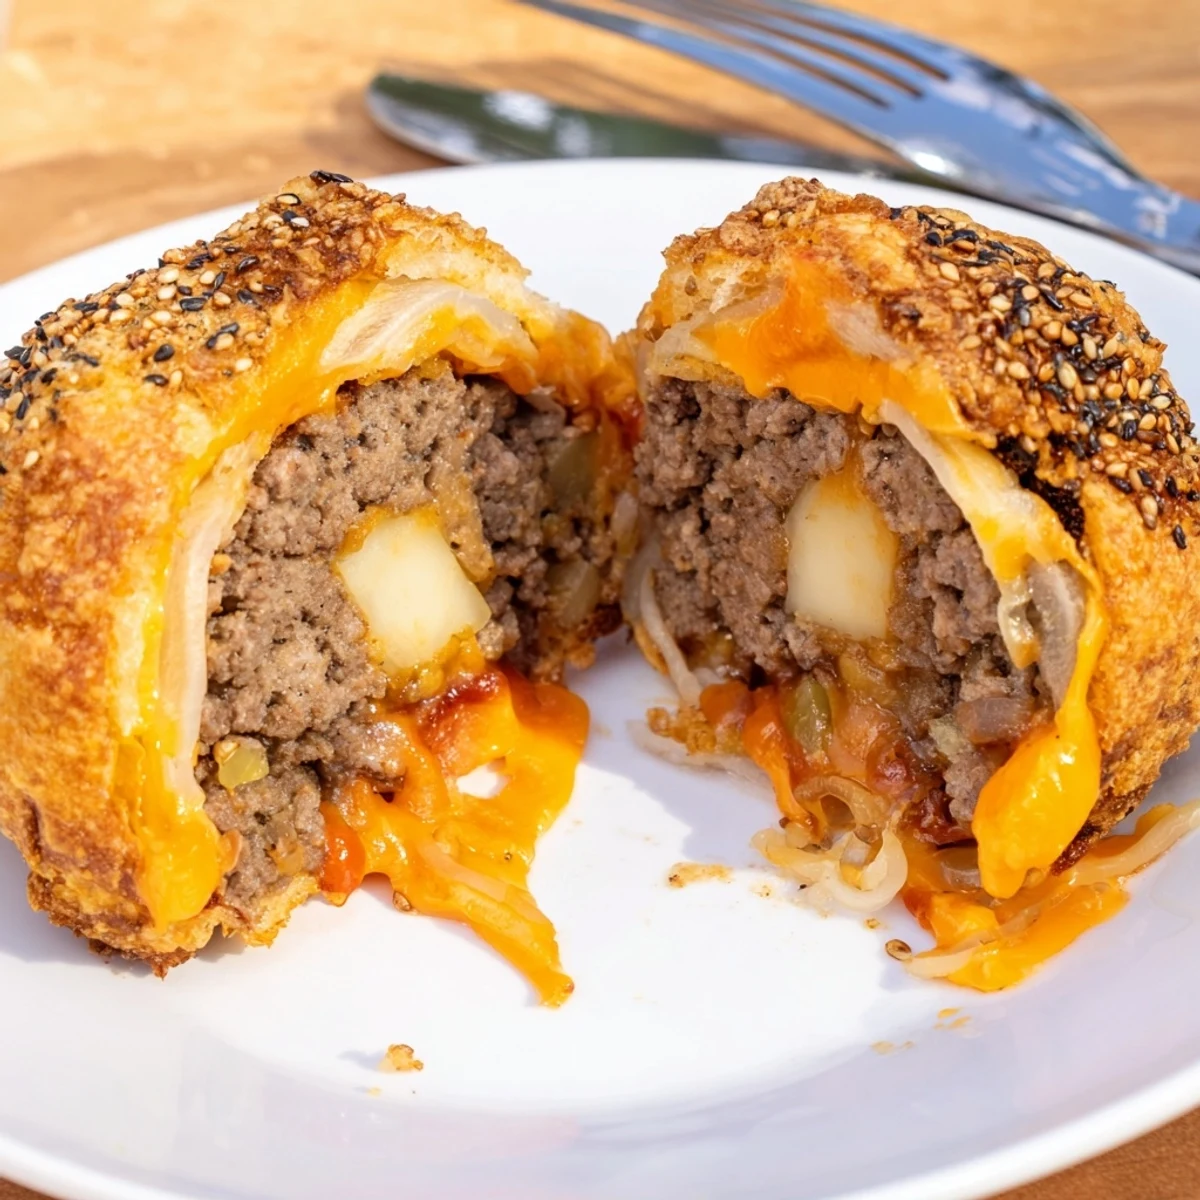
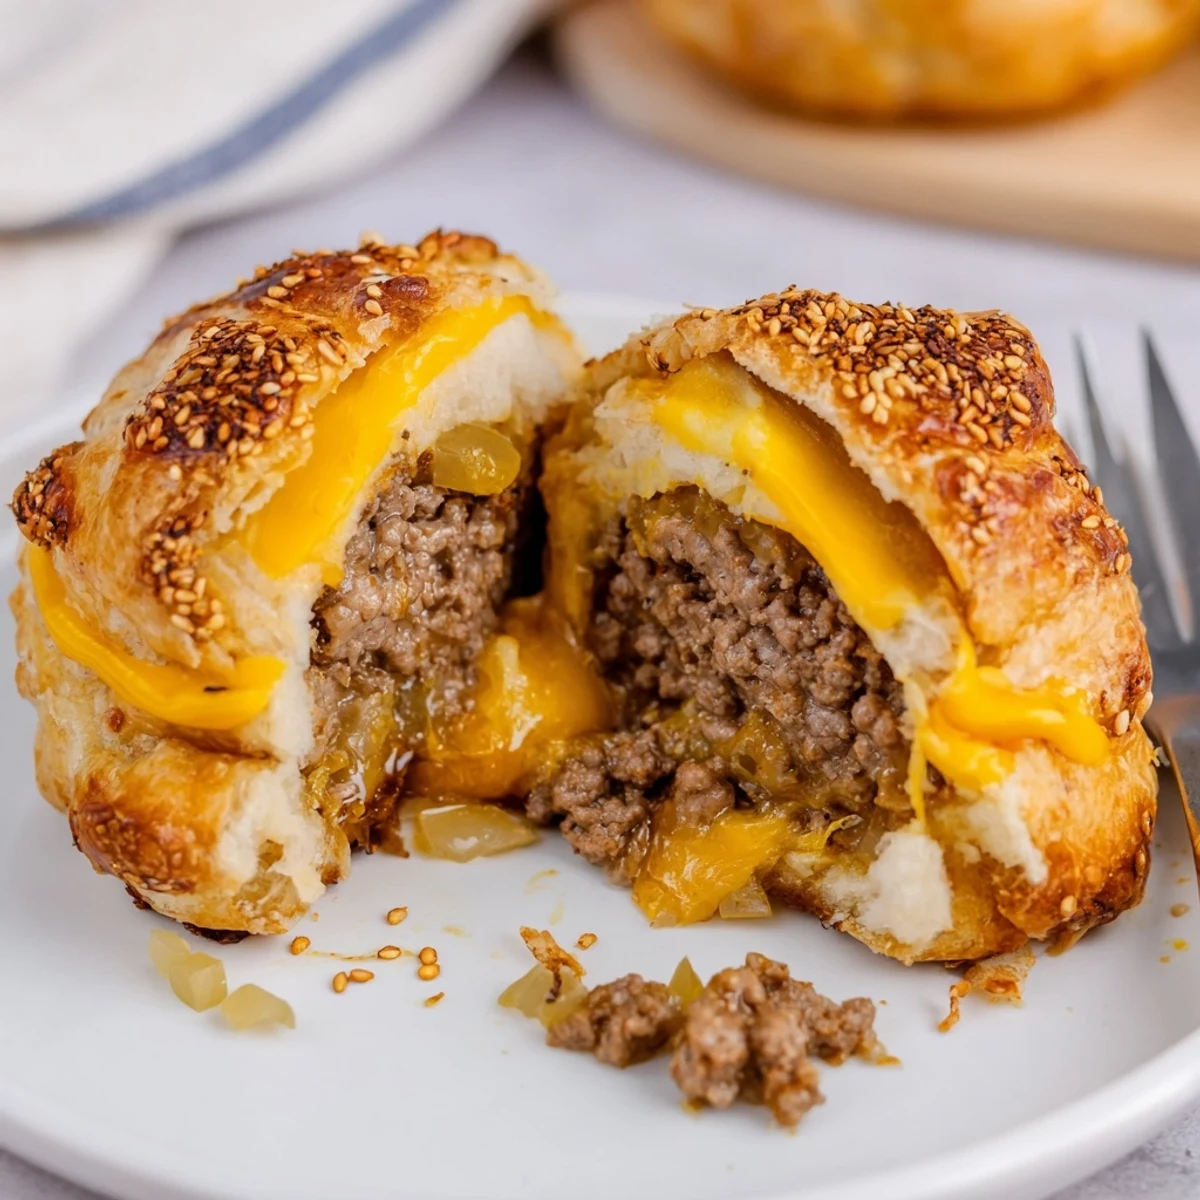
Save Turn ground beef, sautéed onion and seasonings into bite-sized stuffed balls placed onto flattened biscuit rounds. Add shredded cheddar and a mozzarella cube, seal and brush with egg and sesame. Bake at 200°C (400°F) until golden, about 15–18 minutes. Makes 8 handheld, gooey bites with rich, melty centers — allow to cool briefly before serving with dipping sauces.
The sizzle of a skillet and the irresistible smell of melting cheese are usually enough to pull everyone into my kitchen, and that's exactly what happened the first time I tried these Cheesy Cheeseburger Bombs. It started out as a last-minute way to shake up burger night with friends, but by the time I slid the tray from the oven, we were all cheering like we’d scored in overtime. There's something inherently fun about tucking everything you love about a cheeseburger inside a golden biscuit shell that stays warm long after you pull it from the oven. When you bite in and get that burst of gooey cheese… pure joy.
One Friday night, I decided to surprise my cousin (a notorious burger purist) by tucking in not only cheddar but a hidden cube of mozzarella. Watching the look on her face when she bit in and discovered that molten center made all my mad-dash prep totally worth it. Now, whenever she visits, I know these bombs will be requested before she even walks in the door.
Ingredients
- Ground beef (450 g): Get a blend with a little fat, so the filling stays moist and packed with rich flavor.
- Shredded cheddar cheese (120 g): Adds sharpness and body—a handful extra on top is my sneaky flourish.
- Mozzarella cubes: For that stretchy, dramatic cheese pull buried inside each bomb, don’t skip these.
- Onion: Dice finely and sweat gently; undercooking leaves the flavor harsh while overcooking makes it sweet and soft, perfect for blending.
- Pickle (optional): Chopped tiny, it’s a secret tangy twist that burger lovers always recognize and appreciate.
- Refrigerated biscuit dough: These make life easy, and I learned to flatten them gently with my fingers to avoid tearing.
- Ketchup & Mustard: Just a bit mixed into the filling ups the burger authenticity without being overbearing.
- Worcestershire sauce: One spoonful is all it takes to deepen the beefiness.
- Garlic powder, salt & black pepper: Classic seasoning—never skip the salt or you’ll realize why in the first bite.
- Egg (for egg wash): Just one, beaten, makes the biscuit tops shiny and beautiful for that bakery-style finish.
- Sesame seeds: These add crunch and that classic burger look; I sometimes toast them first for extra nutty flavor.
Instructions
- Kicking things off:
- Preheat your oven to 200°C (400°F) and line a baking sheet with parchment, so nothing sticks and cleanup is snappy.
- Building rich flavor:
- Saute diced onion in a skillet over medium heat until translucent. Toss in the ground beef with garlic powder, salt, and pepper, letting it brown and fill your kitchen with savory smells.
- Stirring in the extras:
- Mix in ketchup, mustard, Worcestershire sauce, and pickles. Give it a big stir, then let cool for a few minutes so you don’t melt the dough.
- Stuffing and shaping:
- Press each biscuit flat with your fingers, then scoop a tablespoon of beef mix and half a tablespoon of cheddar into the center. Place a mozzarella cube on top and gently gather the edges of the dough, pinching firmly to seal.
- Finishing touches:
- Set each ball seam side down on your tray. Brush with egg wash and sprinkle generously with sesame seeds for that irresistible burger top.
- Into the oven:
- Bake for 15–18 minutes, checking when the tops are golden brown and you catch that first whiff of toasty cheese.
- Cool and enjoy:
- Let cool just a few minutes before serving—be warned, the cheese inside will be hot and molten! Serve with extra sauces and watch everyone come back for seconds.
 Save
Save One summer evening, my neighbor arrived with her hungry kids just as these bombs came out of the oven. We ended up eating the batch in the backyard, trading stories under twinkle lights with sticky fingers and plenty of laughter—no one missed the usual burgers at all.
Getting Creative with Fillings
I’ve learned that the base recipe is just the start—a handful of cooked bacon, swapping in pepper jack, or even dicing up some jalapenos can take these bombs in completely new directions. There’s magic in finding those favorite add-ins that light up someone’s face when they bite in.
Dough Tips for Foolproof Bombs
The first time I made these, I was too rough with the biscuit dough and tore a few, which leaked cheese everywhere. Now I flatten each piece gently with my hands and keep the filling right in the center to guarantee a neat, sealed ball every time.
Easy Serving and Storage Ideas
The best part? These bombs taste just as great reheated. If you’re making ahead or dealing with leftovers, a quick spin in the oven or air fryer brings back the crispiness.
- Let them cool before packing them up so they stay fluffy.
- Store in an airtight container in the fridge for up to three days.
- Wrap in foil and pop in a lunchbox—they’re ideal on-the-go snacks.
 Save
Save Sharing these cheesy, stuffed bombs always leads to big smiles and happy, sticky hands. Here’s to making burger night an adventure worth repeating.
Recipe FAQs
- → How do I prevent soggy bottoms?
-
Drain excess fat from the cooked beef and avoid overfilling the dough. Space the bombs on a lined baking sheet and brush with egg wash to encourage browning. Baking on parchment or a lightly greased sheet helps crisp the base.
- → Can I prepare these ahead of time?
-
Yes. Assemble and refrigerate the sealed balls for up to 24 hours before baking. Chilled bombs hold their shape better and will need only a few extra minutes in the oven if straight from the fridge.
- → What's the best way to freeze them?
-
Freeze on a baking sheet until firm, then transfer to an airtight container. Bake from frozen at 200°C (400°F), adding about 5–8 minutes to the baking time, or thaw overnight and bake as usual.
- → What substitutions work for dough and cheeses?
-
Use crescent or pizza dough in place of biscuit rounds for a different texture. Swap cheddar for pepper jack for heat, or use smoked gouda for a deeper flavor. Mini mozzarella balls work instead of cubes for convenience.
- → How can I ensure the seams stay sealed?
-
Pinch the edges firmly and press to seal; a quick chill for 10–15 minutes helps the dough hold. Use a small amount of water or egg wash on the edges before sealing to improve adhesion.
- → What add-ins pair well with the filling?
-
Cooked bacon bits, diced pickles, caramelized onions or pickled jalapeño slices all complement the beef and cheese. Add sparingly to avoid overstuffing and ensure even baking.